DAY 01
09:00 → 17:30BUILD/ 002
LEATHER · FURNITURE RESTORATION
25 YEARS OF USE.
NOT THE END
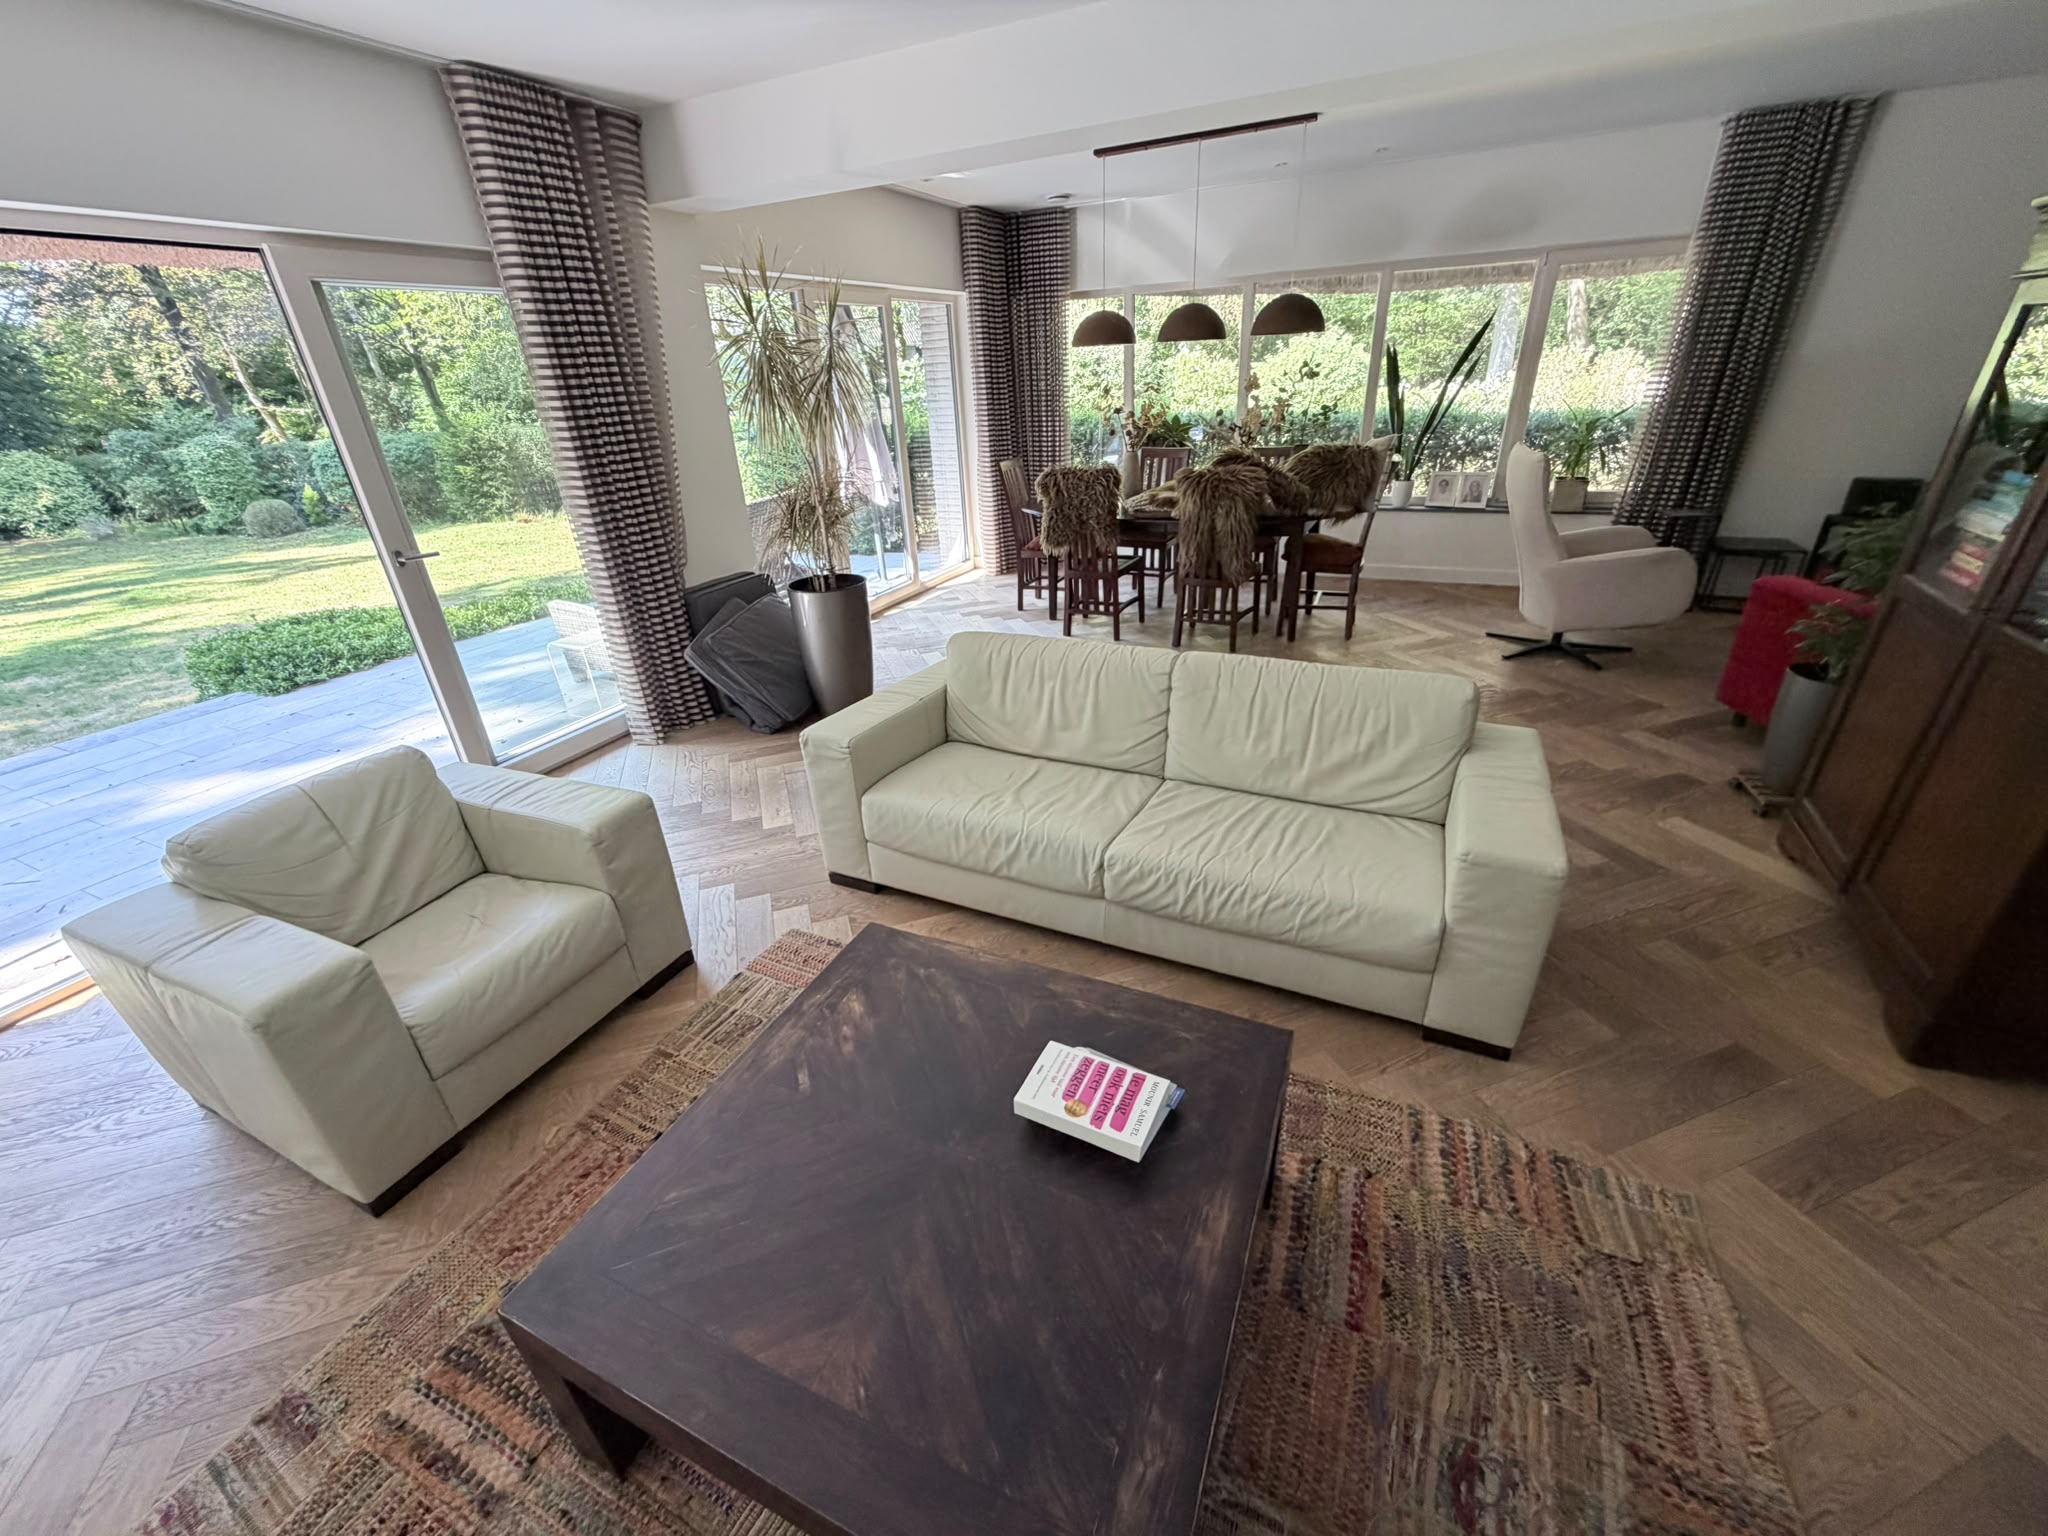
A two-piece leather furniture set.
One sofa. One armchair.
Approximately twenty-five years old.
The owners didn't want to replace it.
They wanted to give it another life.
01/ STARTING POINT
AGE SHOWS DIFFERENTLY
ON LEATHER
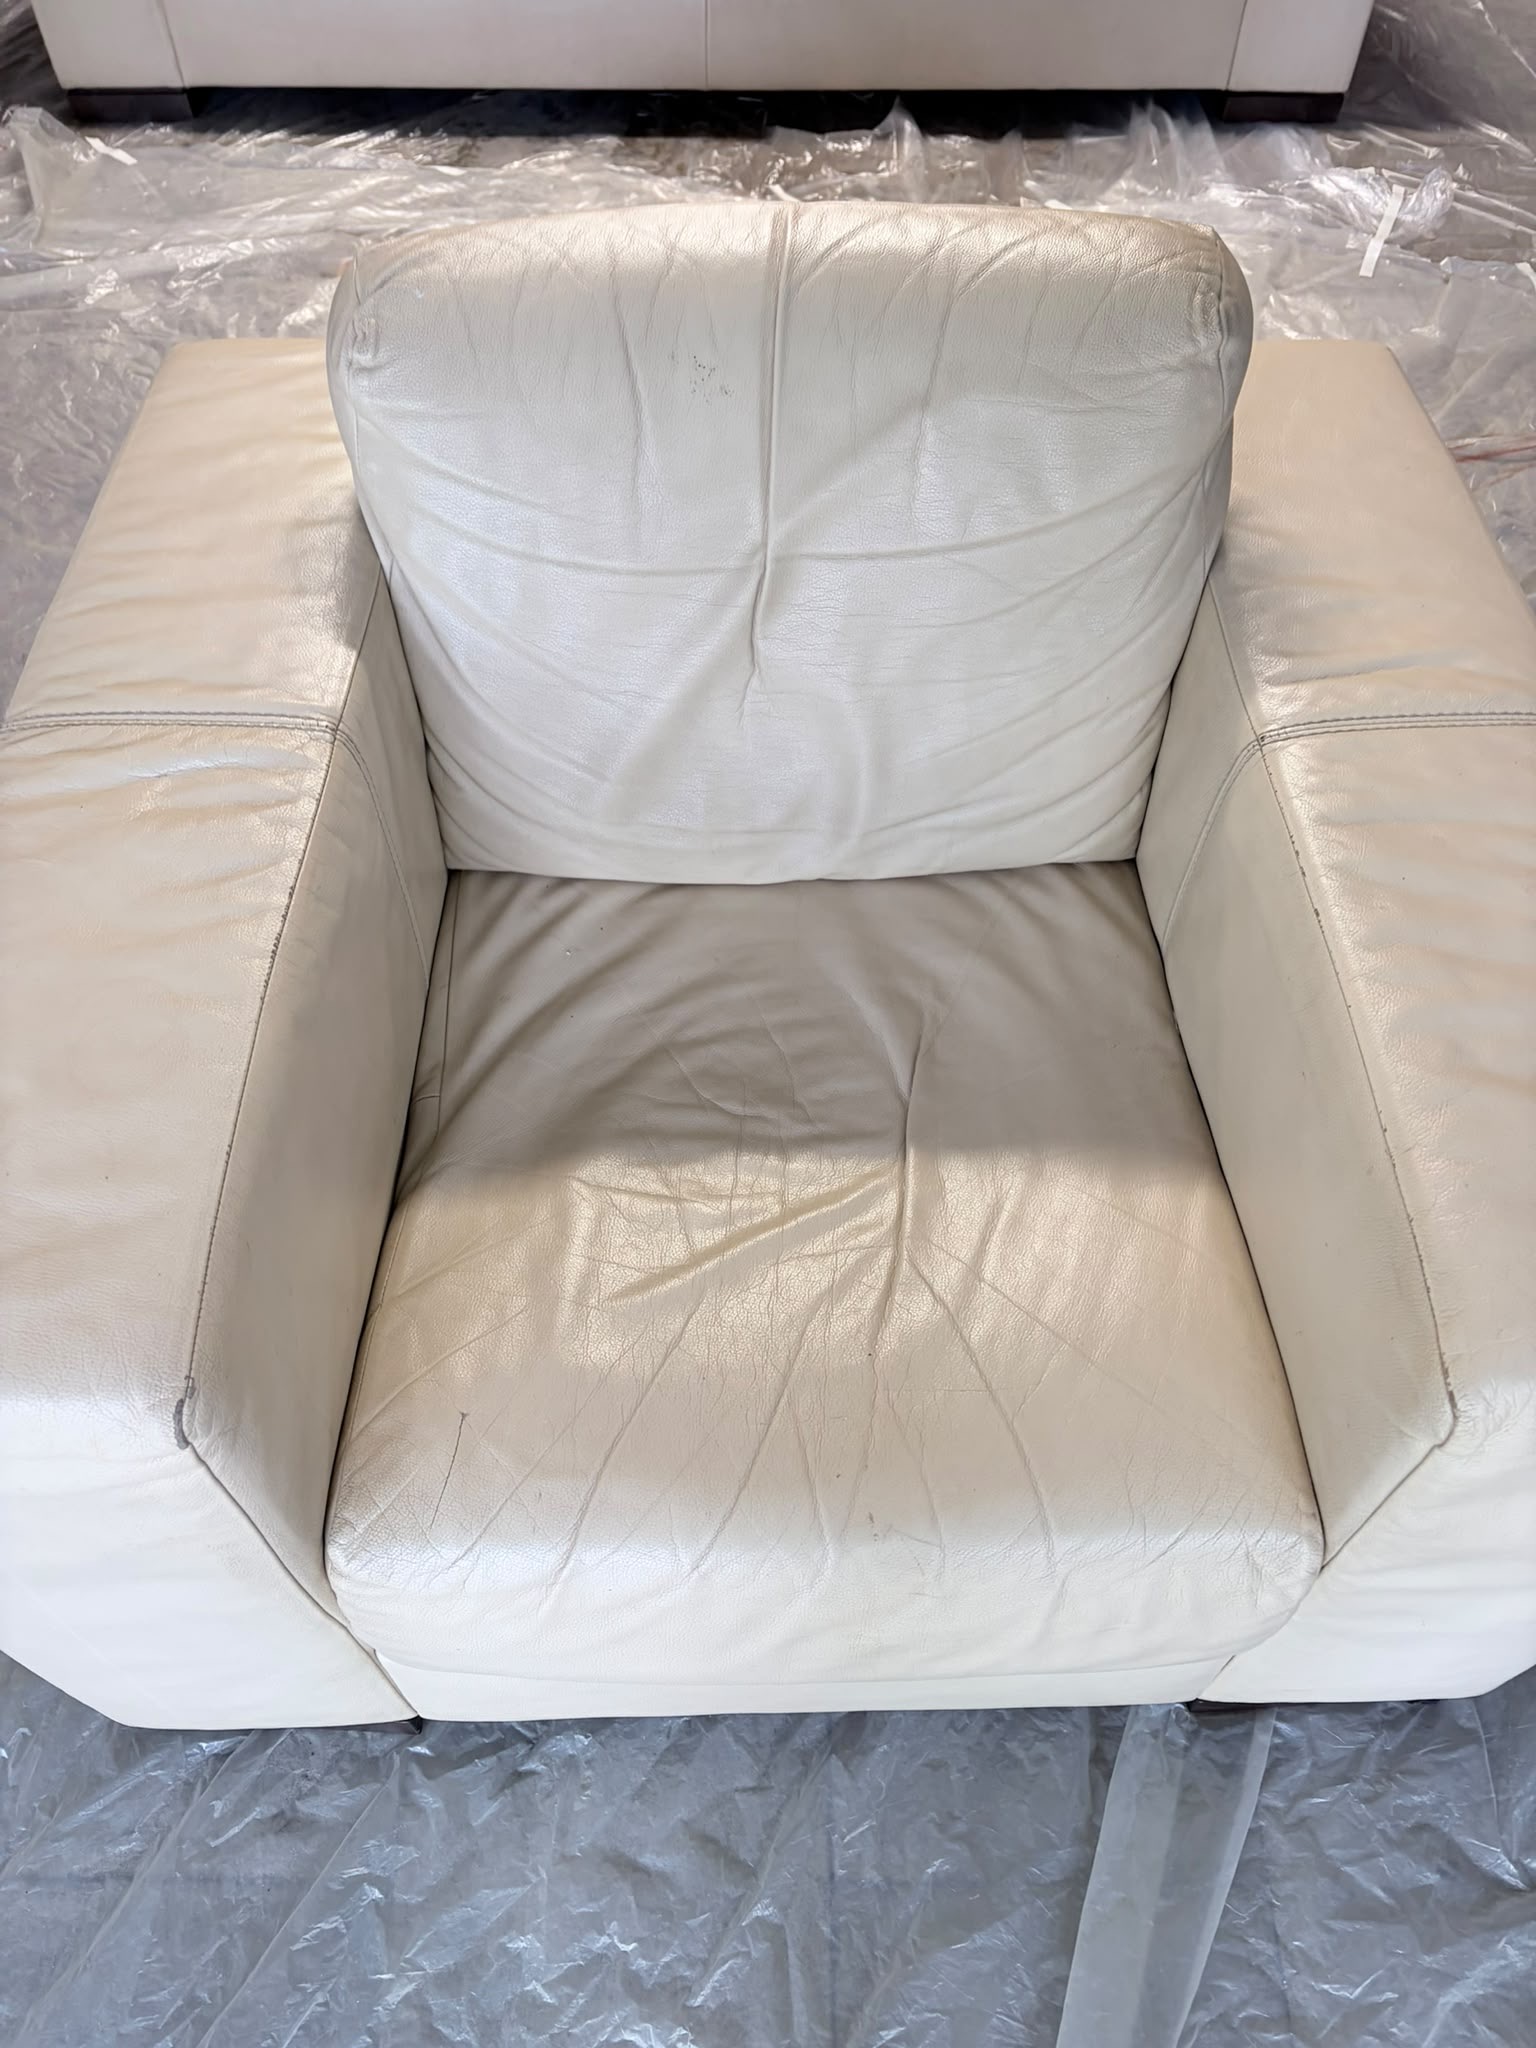
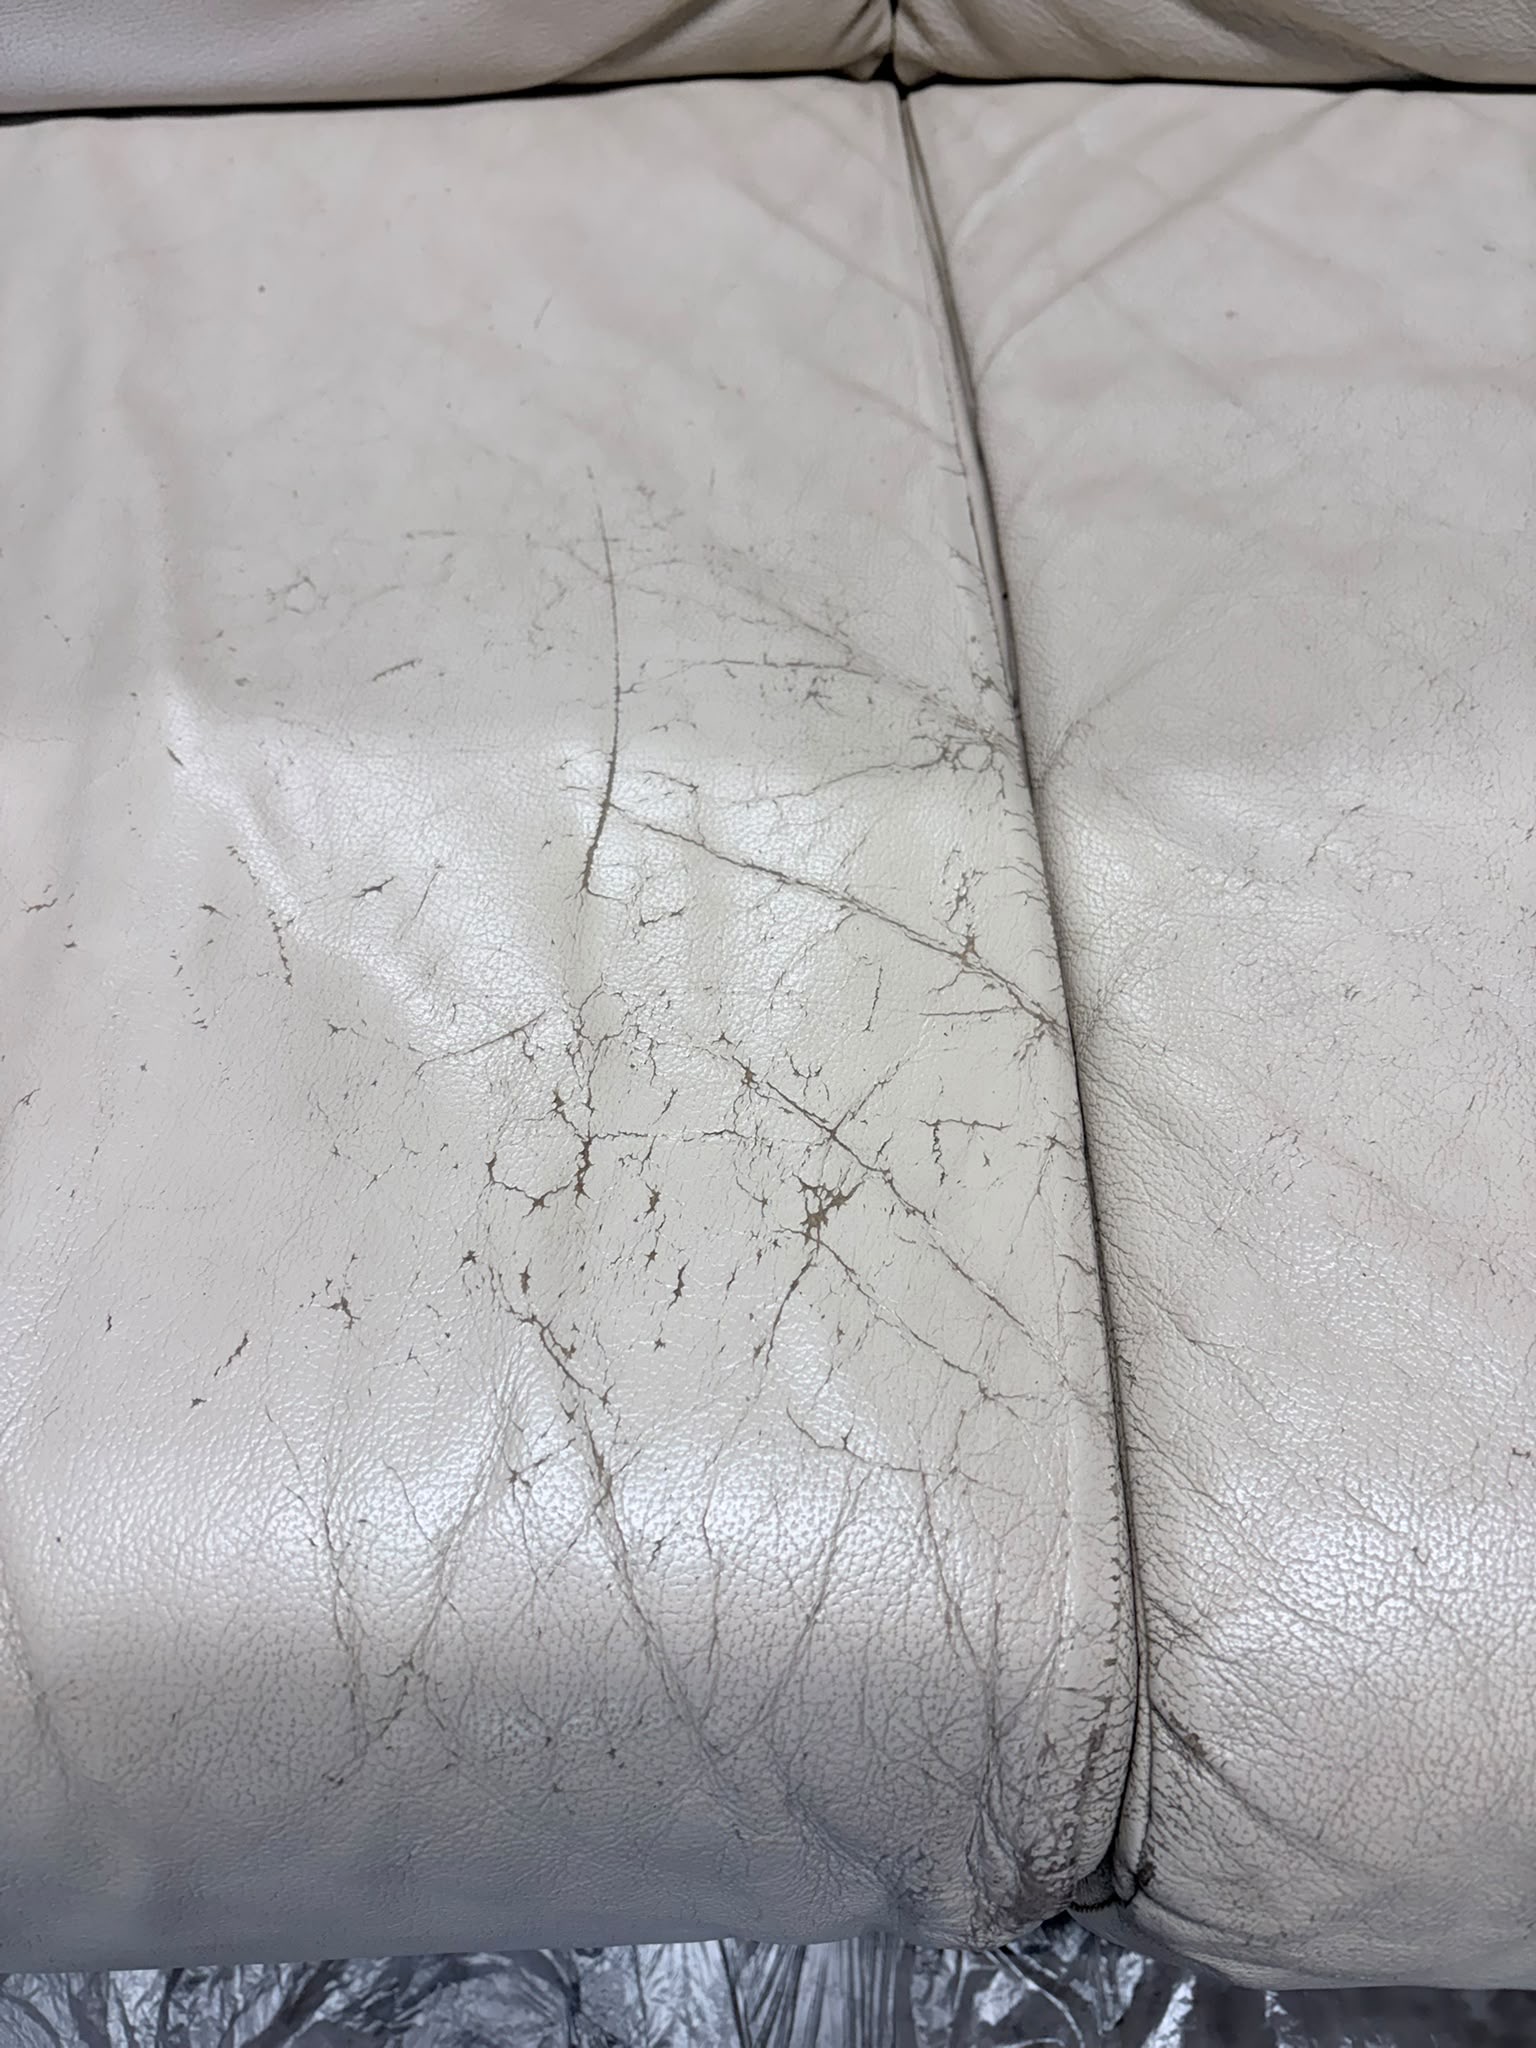
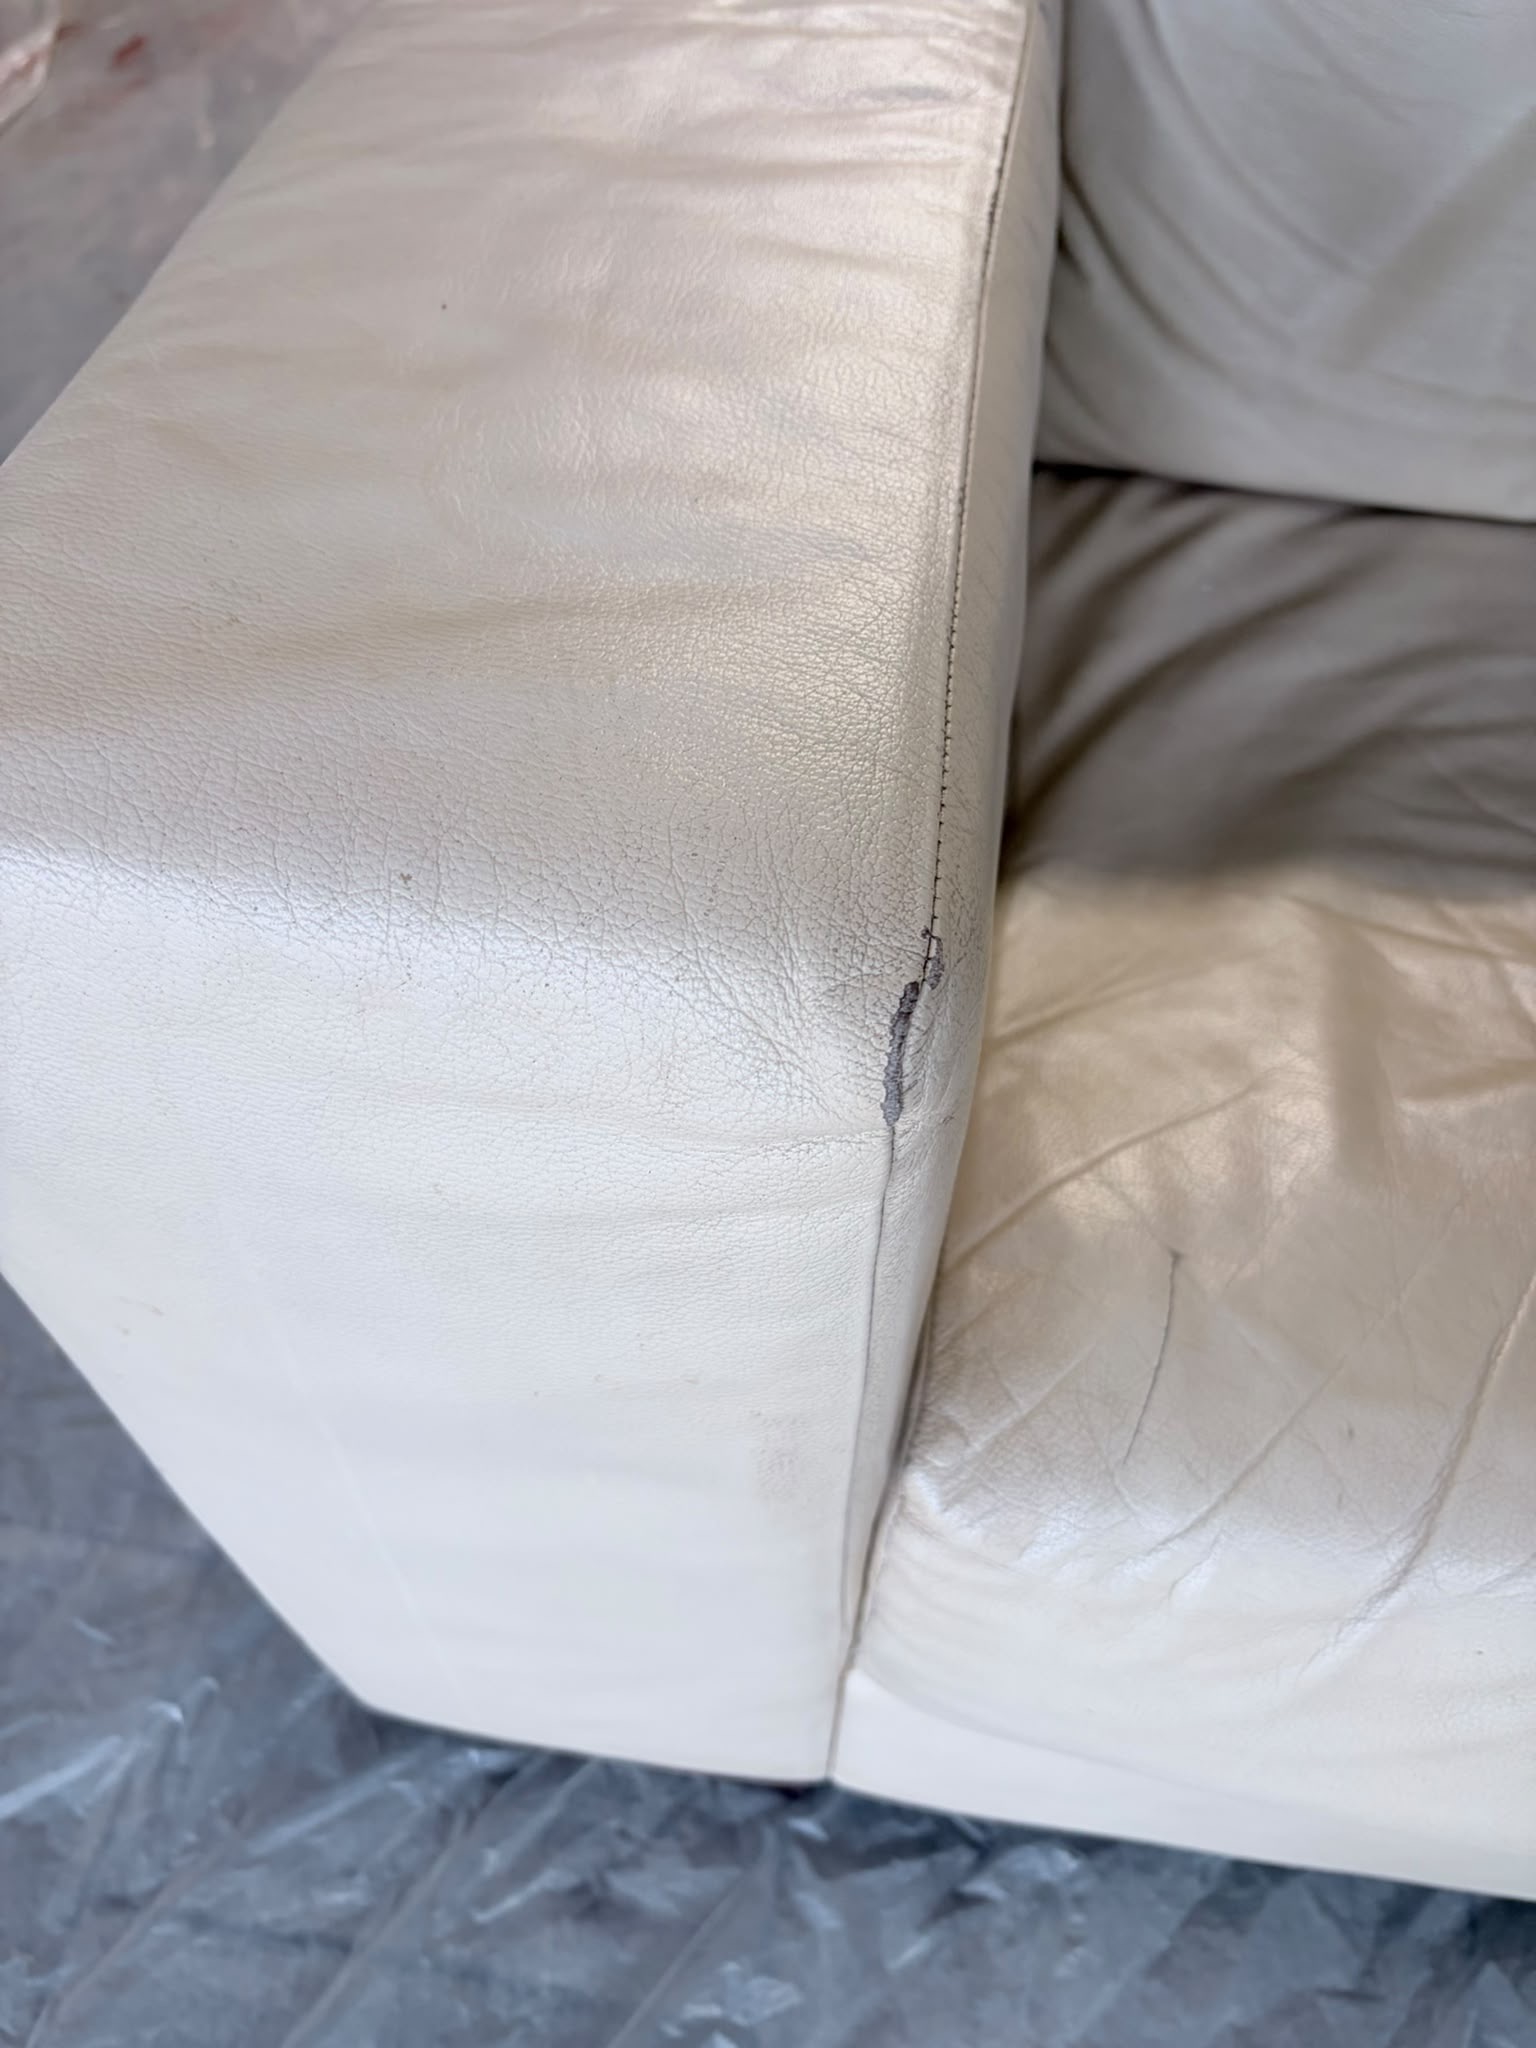
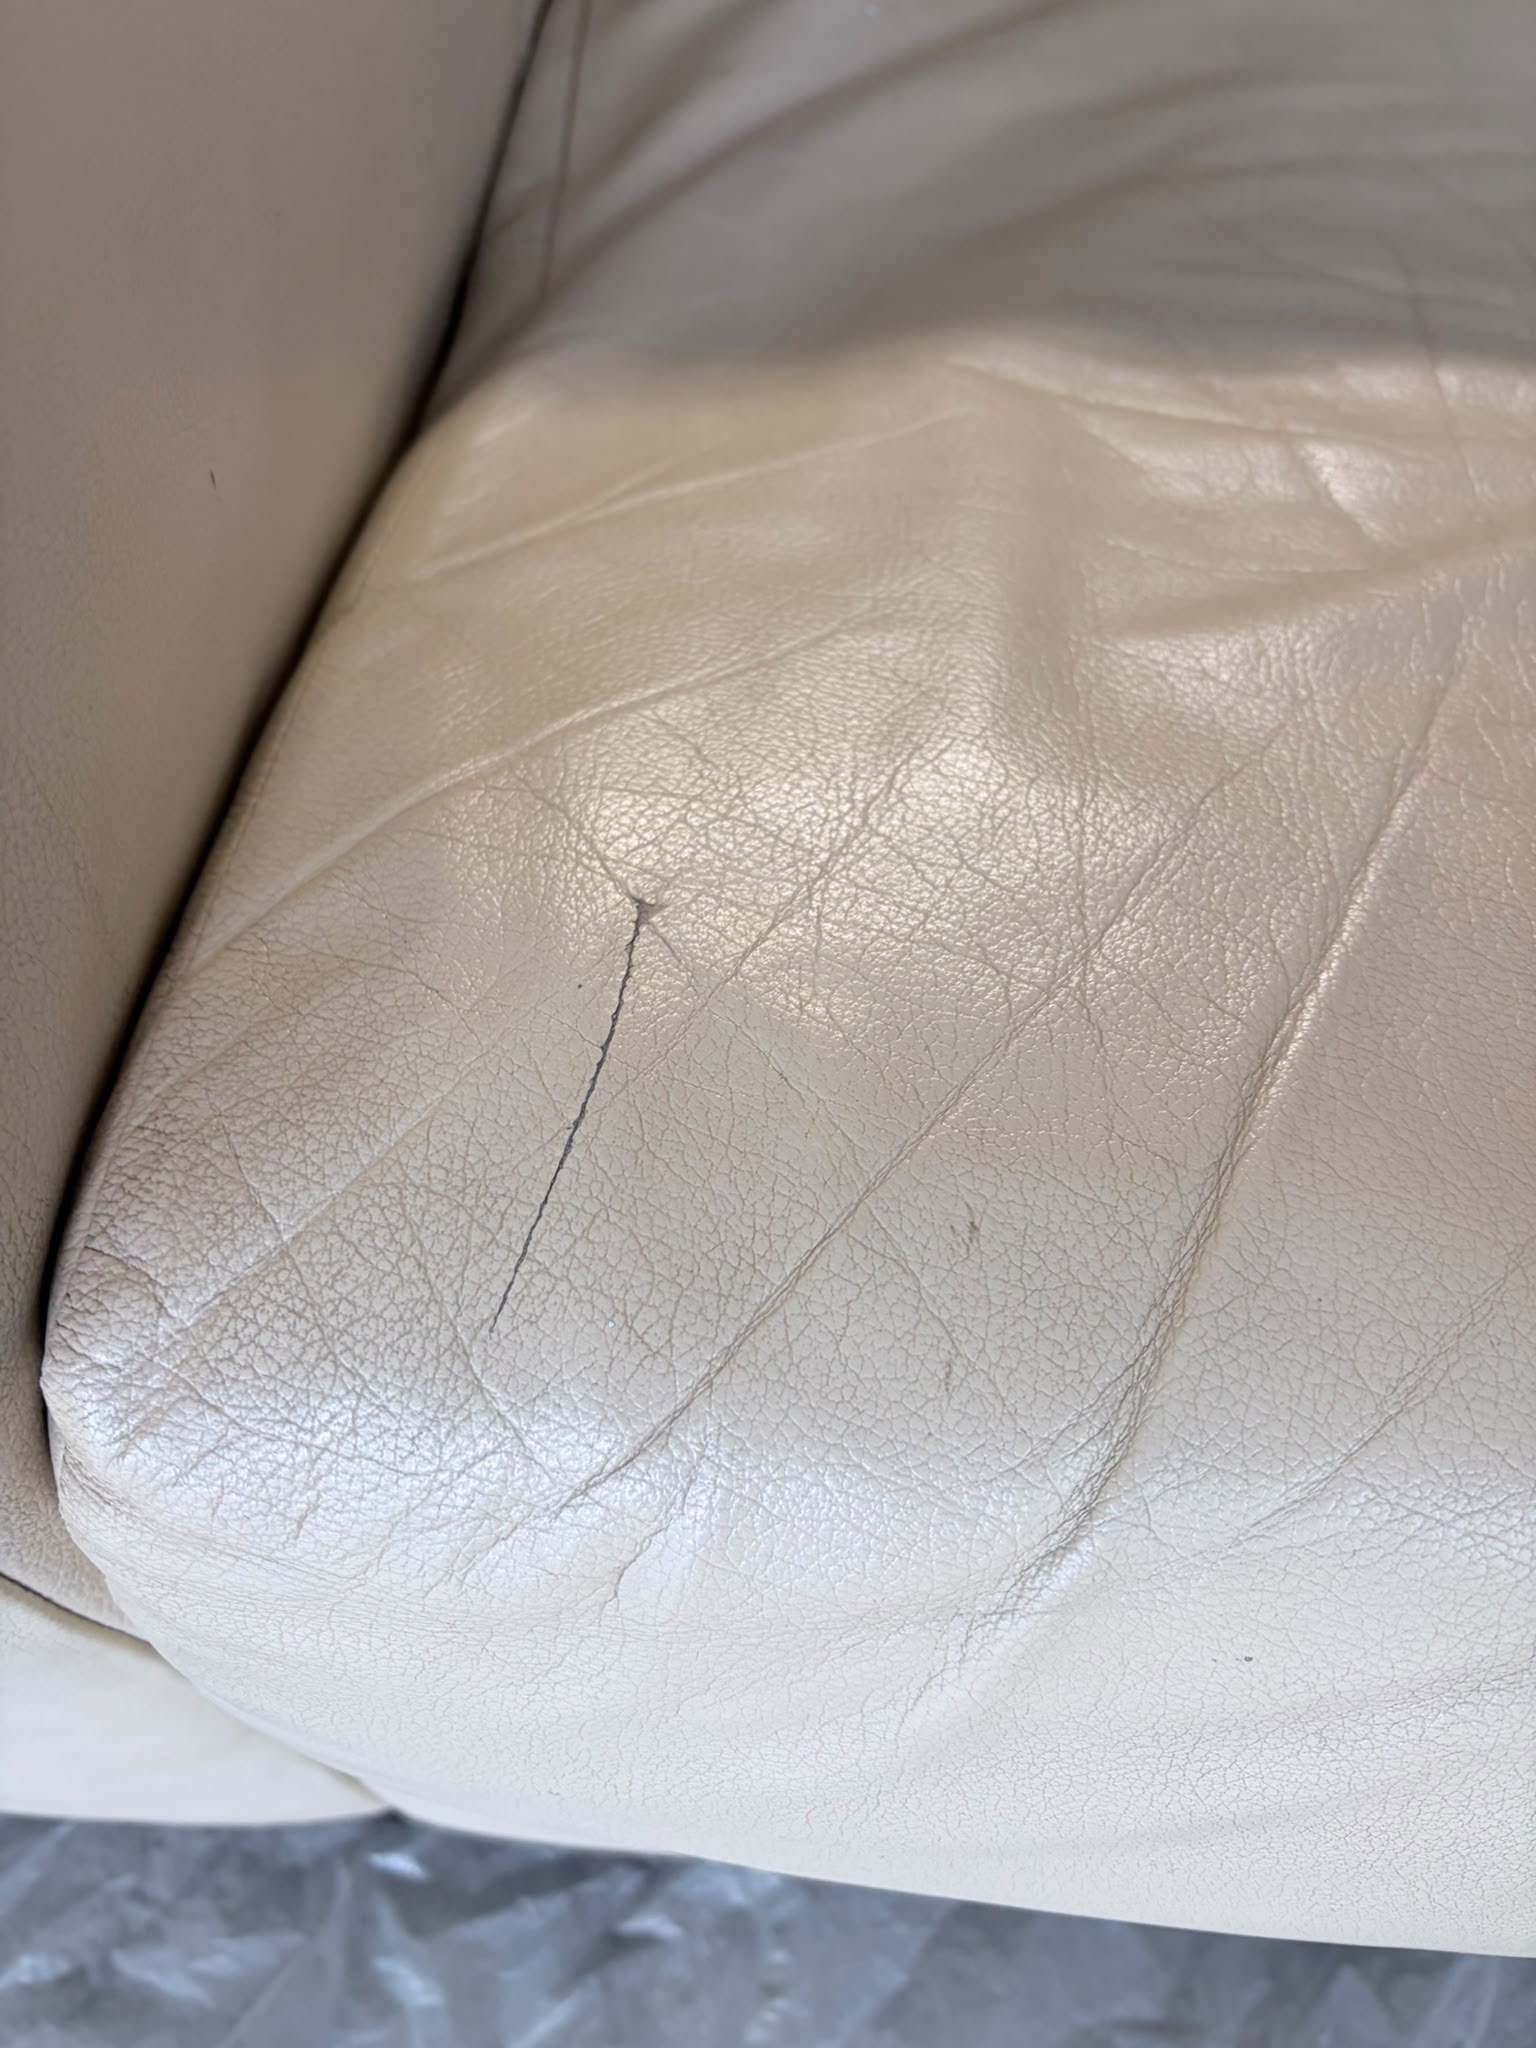
The first inspection already showed extensive wear.
The most heavily used areas had cracked and damaged finish, colour loss, deeper local damage and visible wear on the seat cushions and armrests.
But wear alone doesn't decide whether leather should be replaced.
First, the material had to be identified and assessed.
Visual inspection gave us the first indication.
The embossing on the back of the sofa and armchair gave us additional confirmation of the leather type we were working with.
THE QUESTION WASN'T
Can we make it look new?THE QUESTION WAS
Is the material still suitable for restoration?In this case, the answer was yes.
02/ PREPARATION
THE FINISH
COMES LATER
Before repairing colour, the surface had to be properly prepared.
The leather was thoroughly cleaned using MZR and a scrub pad.
Contamination, old surface residues and accumulated dirt had to be removed before moving into the restoration stages.
From this point, the work followed the Colourlock restoration procedure appropriate to the condition of the leather.
Preparation isn't the part that creates the final photograph.
But everything that comes afterwards depends on it.
03/ SURFACE WORK
REMOVE WHAT
CAN'T STAY
Damaged areas required controlled surface preparation.
GLD was used according to the restoration procedure to work on the existing coating and prepare the appropriate areas for further treatment.
Mechanical preparation and sanding were used where required.
After sanding, Leather Cleaning Spirit / Leder Reinigungsbenzin was used to degrease the prepared surface.
PROCESS / SURFACE WORK
Original project documentation.
04/ REPAIR
COLOUR DOESN'T
REPAIR STRUCTURE
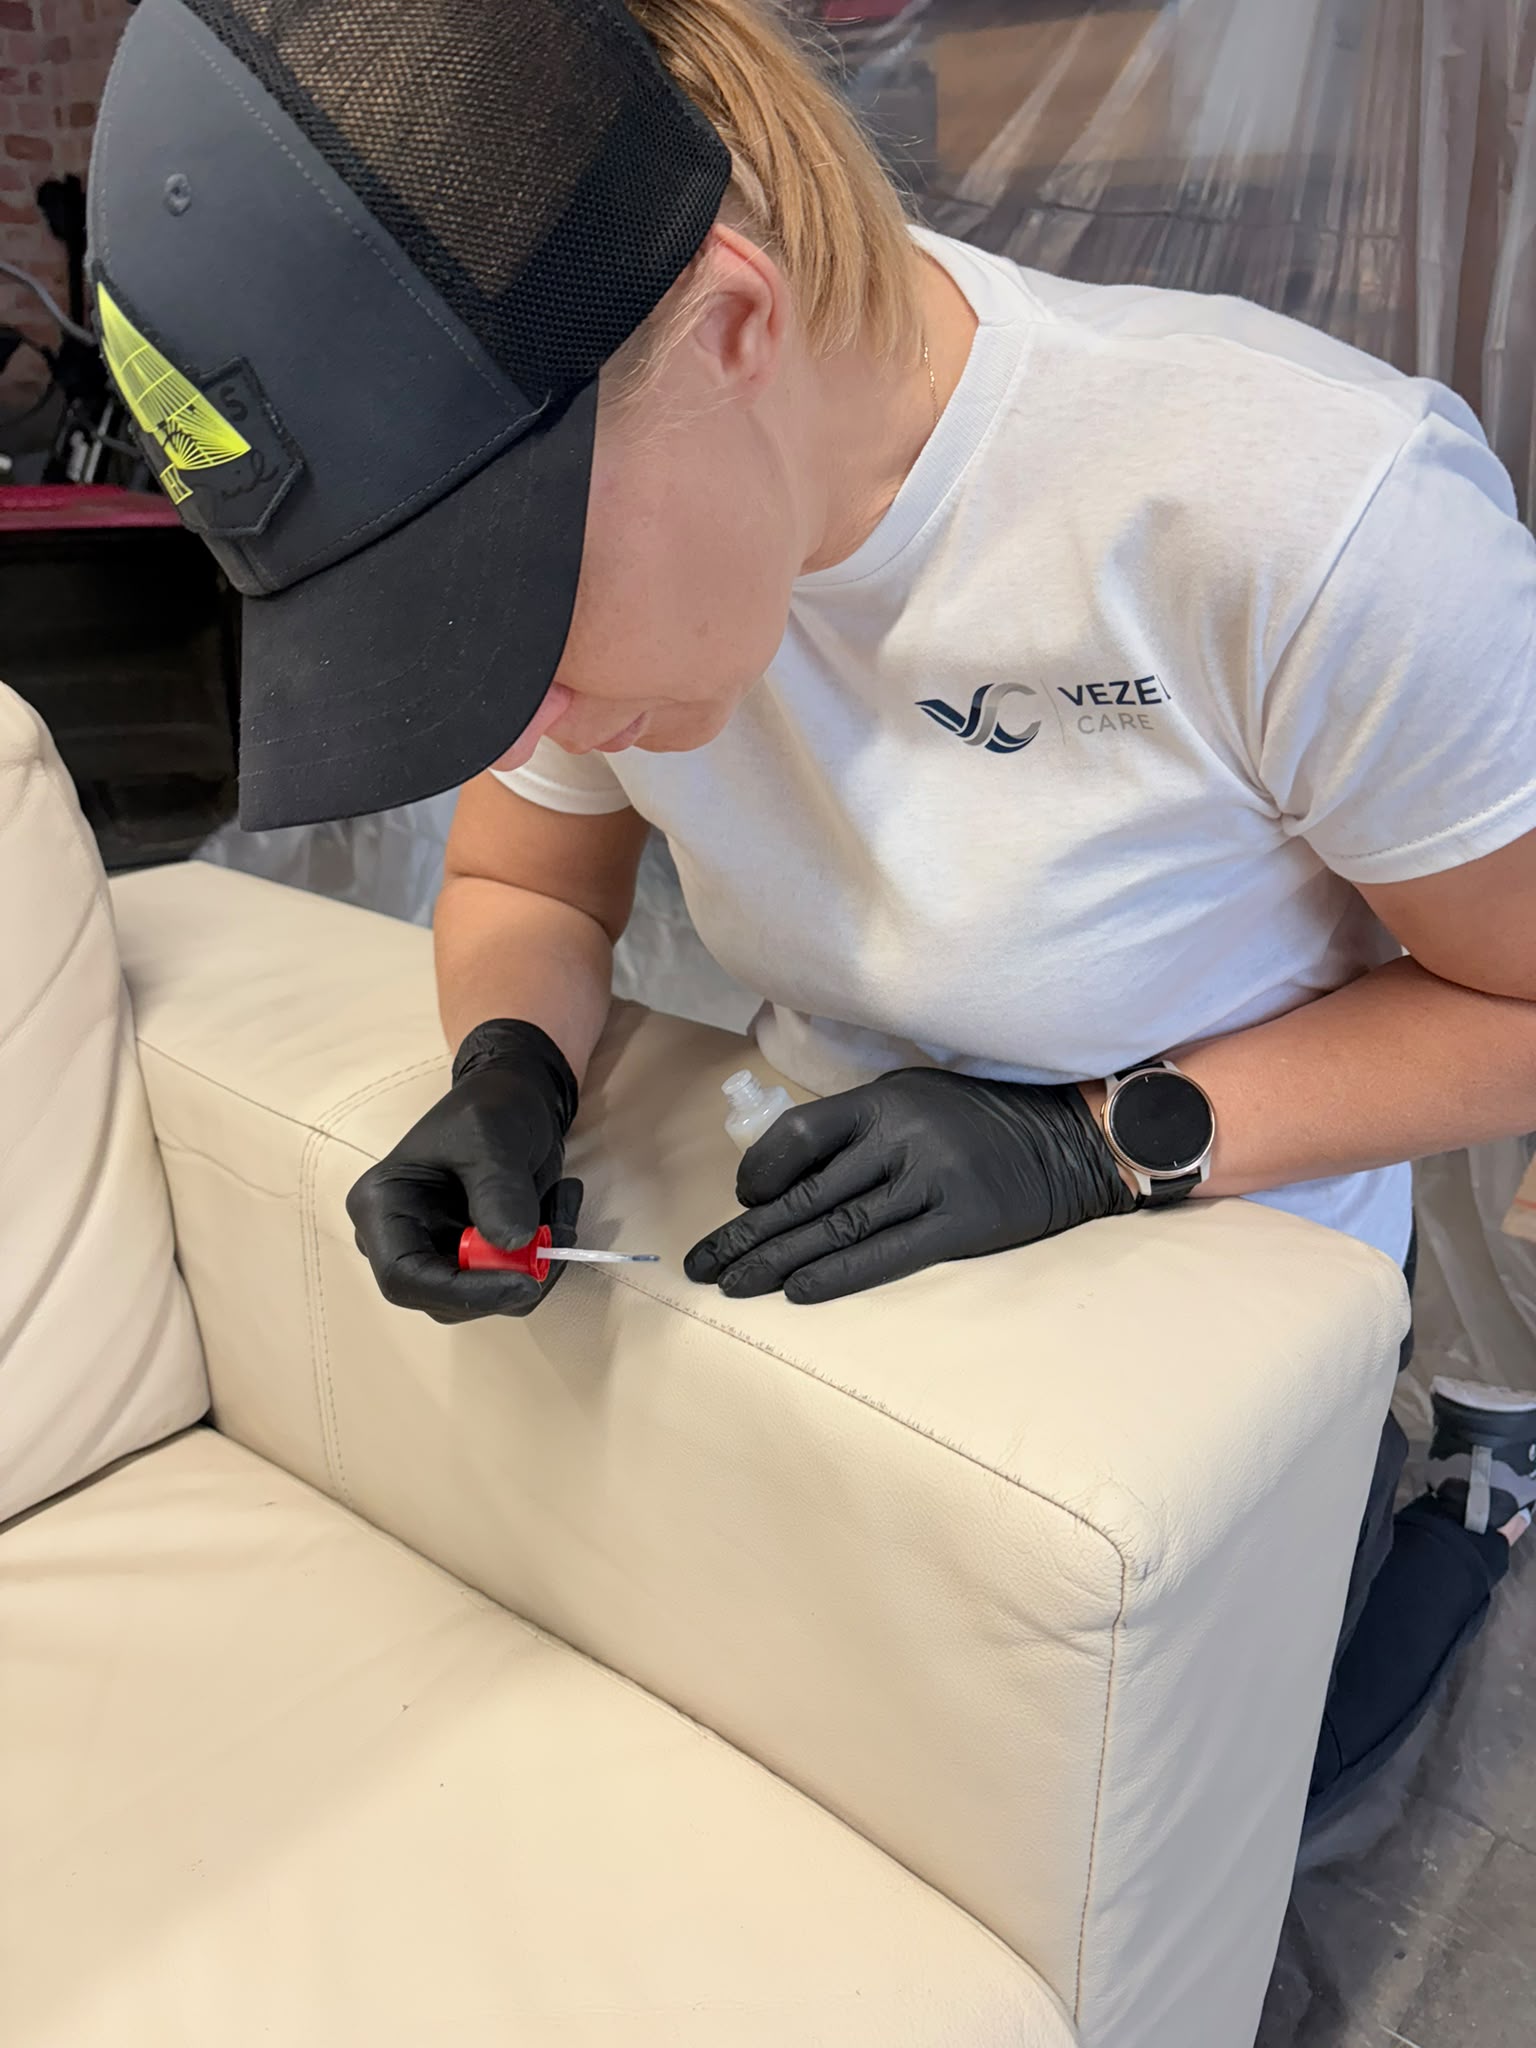
Local damage had to be dealt with before refinishing.
Depending on the condition of individual areas, the restoration included primer, filler and liquid leather, followed by the required surface preparation.
The objective was not to hide damage underneath pigment.
It was to create a stable surface capable of accepting the subsequent coating system.
Only then could we move to colour.
05/ COLOUR
BEIGE ISN'T
JUST BEIGE
This was one of the most interesting parts of the project for me.
Reproducing beige accurately is difficult.
Small changes in pigment proportions can move the colour in a completely different direction.
And knowing what to add — and how much — isn't something that comes from reading one formula.
MIXING.TESTING.COMPARING.CORRECTING.DOING IT AGAIN.
COLOUR MATCHING IS A SKILL
BUILT IN WORKING HOURS
We prepared an individual colour mixture for this set.
Some Colourlock pigments can be relatively dense, so a small amount of primer can be added to the spray cup where appropriate to improve working consistency.
06/ APPLICATION
THIN LAYERS.
CONTROLLED DRYING
The colour was applied progressively rather than trying to obtain coverage in one heavy application.
Between thin layers, the surface was dried with a heat gun.
The reason is simple:
CONTROL
Too much wet material can flood the leather grain and compromise the finish.
Several controlled layers allow the coating to build gradually while preserving the character of the surface.
The same principle continued through the finishing stages.
PROCESS / SPRAY APPLICATION
Original project documentation.
07/ FINISHING SYSTEM
COLOUR ISN'T
THE LAST LAYER
After achieving the required colour and coverage, the restoration continued with the finishing system.
The process included the appropriate hardener, followed by the finishing lacquer and finally a protective polymer layer.
The objective wasn't simply to make the furniture look better when we left.
The coating system had to function as a system.
PREPARATION↓REPAIR↓ADHESION↓COLOUR↓FINISH↓PROTECTION
Each stage supports the next one.
08/ TIME
TWO PEOPLE.
ONE PROCESS
DAY 02
09:15 → 11:00- ELAPSED PROJECT WORKING WINDOW
- 10 H 15 MIN
Both of us worked on the same restoration stages rather than dividing the project into separate specialist roles.
That makes this project particularly useful for my own learning.
I wasn't watching someone restore leather.
I WAS DOING THE WORK
09/ OBSERVATION
COLOUR MATCHING
IS ITS OWN CRAFT
One thing became particularly clear during this project.
Understanding the restoration procedure and reproducing colour are related skills — but they aren't the same skill.
I can learn the sequence.
I can learn what each product does.
I can understand why the surface needs a particular treatment.
But colour perception and correction require repetition.
Especially with shades like beige.
There is no shortcut for experience.
There may, however, be better tools.
10/ WHAT I'M WATCHING NEXT
TECHNOLOGY / COLOUR
HUMAN EYE
→ DATA
→ HUMAN DECISION
Colourlock has introduced a colour-reading device designed to measure a surface and support colour formulation.
That interests me.
Not because I want technology to replace understanding colour.
The opposite.
I want to understand how much a measurement system can improve repeatability while I continue developing my own ability to recognise and correct colour.
MEASURE.MIX.COMPARE.LEARN
11/ RESULT
BUILD / 002 — COMPLETED
ANOTHER LIFE
The objective wasn't to turn a twenty-five-year-old piece of furniture into something pretending to be new.
Its age still exists.
Its creases still exist.
Its history still exists.
What changed was the condition of the surface.
Damaged areas were repaired.
The finish was rebuilt.
The colour was restored.
And a piece of furniture the owners wanted to keep could return to their home.
RESTORATION ISN'T ALWAYS ABOUT ERASING AGE.
SOMETIMES IT'S ABOUT MAKING AGE WORTH KEEPING
PROJECT DATA
BUILD / 002
- BUILD
- 002
- CATEGORY
- LEATHER
- OBJECT
- 2-SEAT SOFA + ARMCHAIR
- AGE
- APPROX. 25 YEARS
- PROCESS
- LEATHER RESTORATION
- SYSTEM
- COLOURLOCK
- TEAM
- 2 PEOPLE
- WORK WINDOW
- 2 DAYS
- STATUS
- COMPLETED
BUILD/ 002 — COMPLETED